

Choose who sees your survey
Set when your survey shows, to which users, on which devices and pages, and for how long, then set it live.
Audience targeting decides when a survey appears, to whom, where, and for how long. A user sees the survey only when every condition you set matches.
Before you start
Section titled “Before you start”- The survey exists, see Create a survey from a template or with AI.
- Your role lets you edit surveys. Showing surveys in mobile apps must be part of your plan.
Open the audience targeting
Section titled “Open the audience targeting”- Open the survey and click Design & targeting at the top.
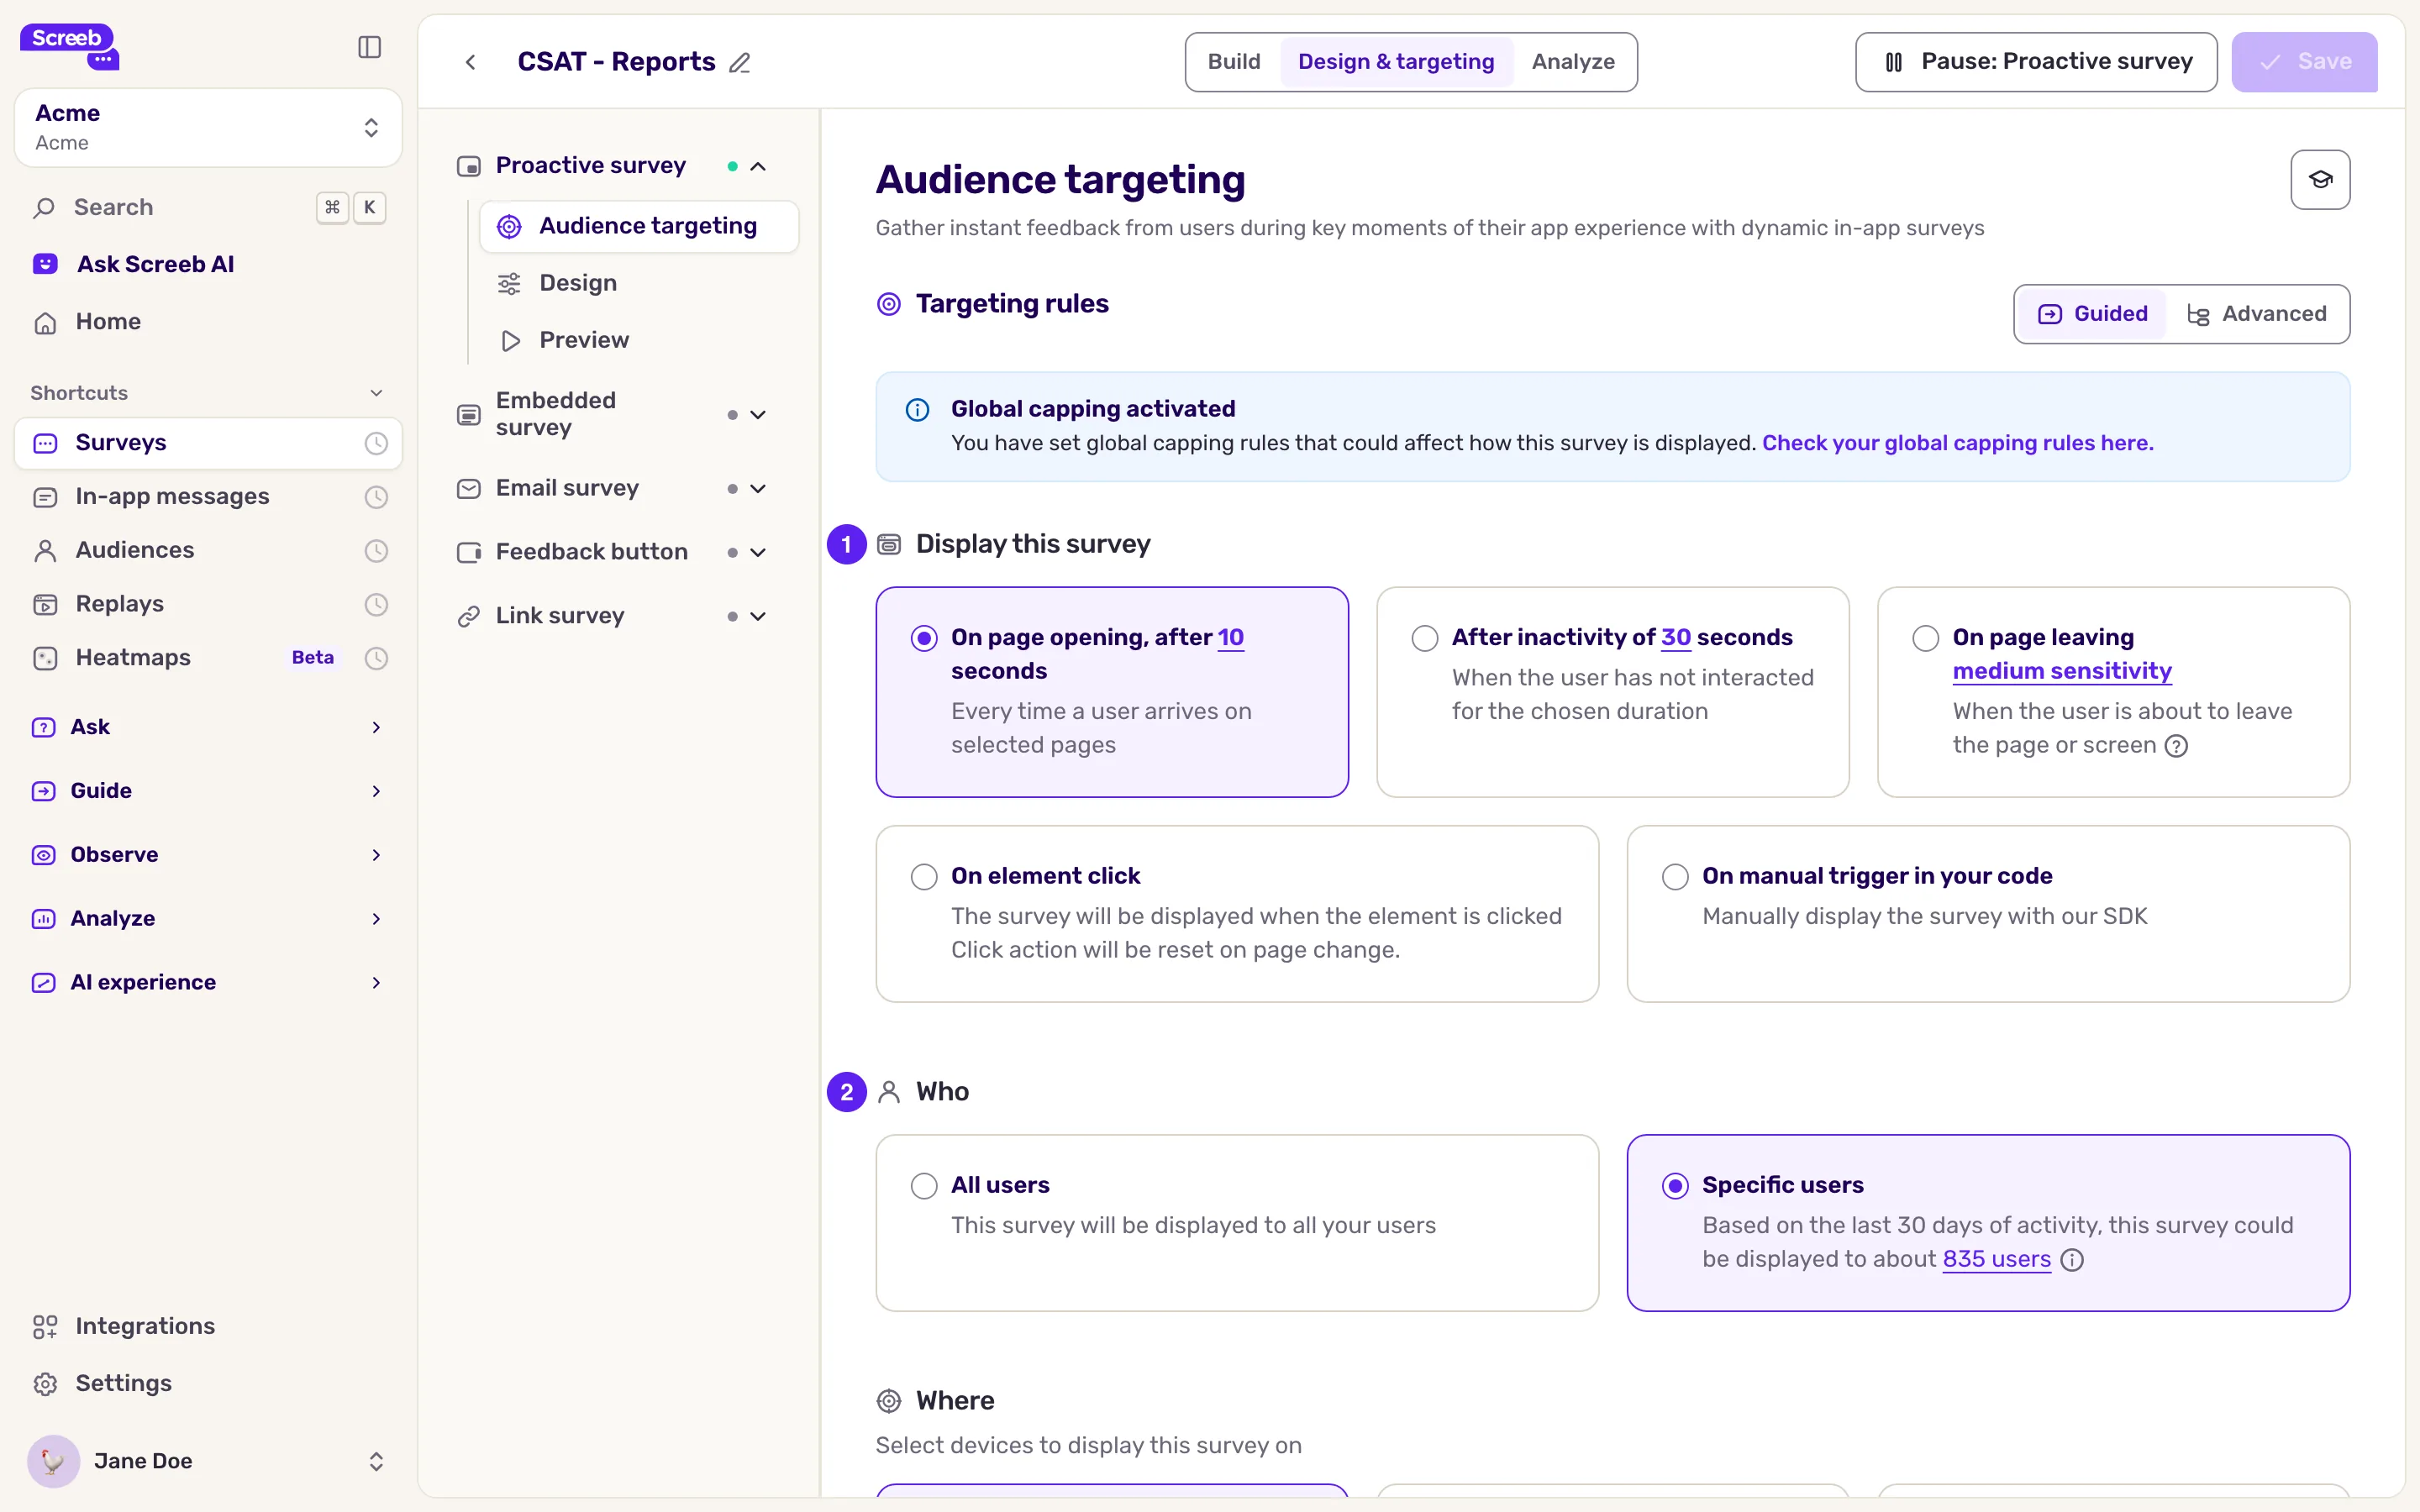
- In the side menu, each channel of the survey has its own targeting. Under the channel, click Audience targeting.
Choose the trigger
Section titled “Choose the trigger”At the top of the section, pick one way to display the survey:
- On page opening, after a number of seconds on the page or screen.
- After inactivity of a number of seconds without interaction.
- On page leaving: when the user is about to leave.
- On element click: when the user clicks an element of your website, picked with a CSS selector. Not available in mobile apps. Choosing this trigger removes the page and moment conditions under Where and When; the devices and the audience stay.
- On manual trigger in your code: your developers start the survey with the SDK, see Start a survey programmatically. Choosing this trigger removes the other conditions, except the devices.
Click the value on a card to change it.
Choose who
Section titled “Choose who”Under Who, keep All users, or narrow the audience:
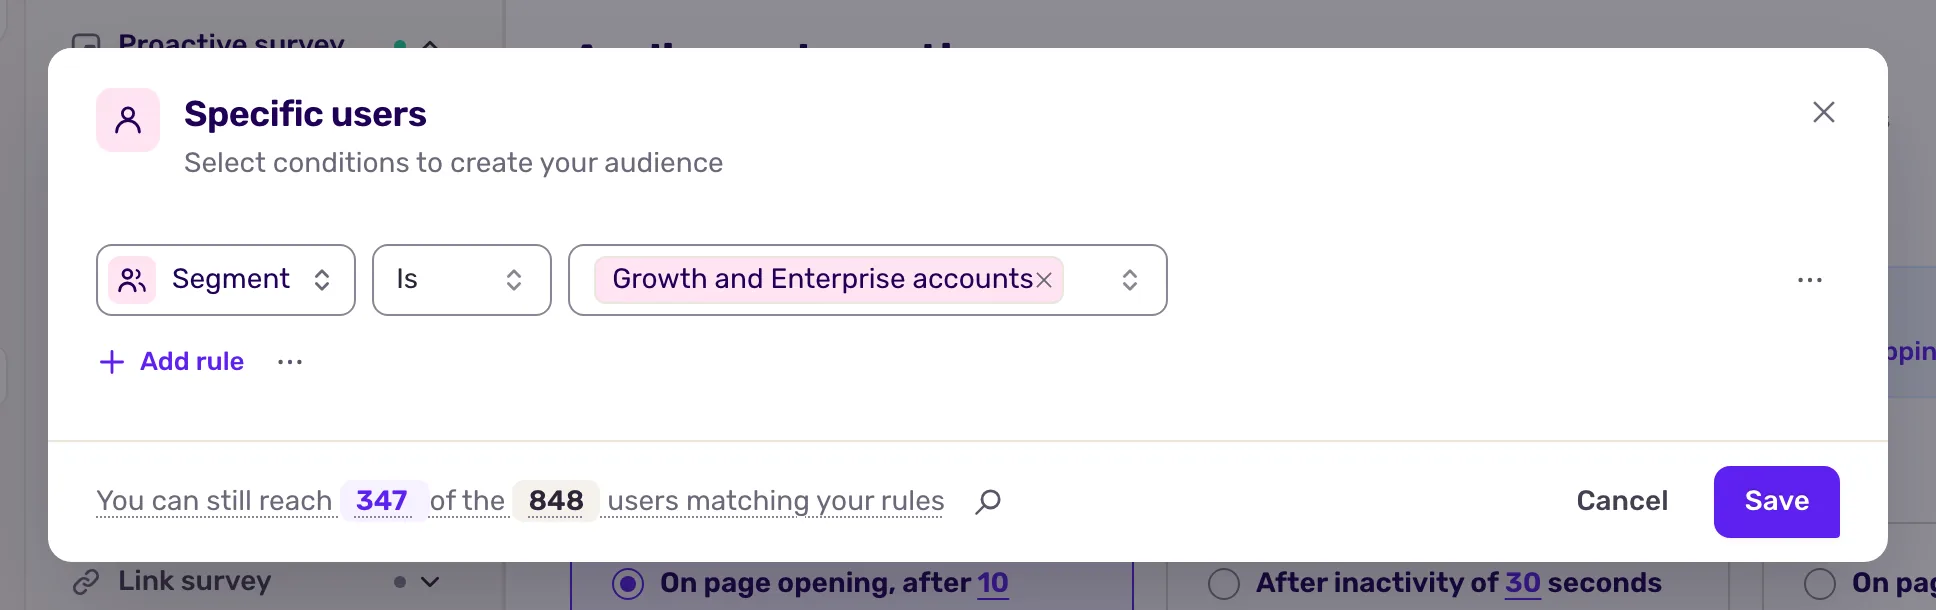
- Click Specific users. A window opens.
- Click Add rule and pick a rule, for example Property, Segment, Performed event (count), Gave a score, Language or Country. Set its operator and value.
- Add more rules the same way and combine them, see Combine rules.
- Check the estimate at the bottom of the window, based on the last 30 days of activity, and click Save.
Rules on properties, events and segments use the data your site or app sends to Screeb, see User properties and User events. With AI agent detection on, the AI classification rule shows or hides the survey for AI agents, see Detect AI agents and AI-referred visitors.
Combine rules
Section titled “Combine rules”A word on the line between two rules shows how they combine: AND (every rule must match) or OR (at least one). Click the first one to switch them all. Hover or focus a word to see which rules it joins: they are framed, the other rules fade. Each group has words of its own, between its rules.
Some rules take several values, such as a page URL, a screen, a property or an event count. Type a value and press Enter, Tab or leave the field: it becomes a chip, spaces included. Paste a list to add one value per line. Any one value matches (“or”); with a negative operator such as “is not”, none may match (“nor”). Click a chip to edit it, or press Backspace in the empty field to edit the last one.
Each rule has a menu on its right, behind the three dots:
- Duplicate adds a copy of the rule right below it. Rules that can only be used once have no copy.
- Turn into group puts the rule in a group of its own, to add alternatives next to it.
- Delete removes the rule.
To mix AND and OR, nest rules in groups. Open the menu next to Add rule under the rules, pick Add rule group, then the group’s first rule. A group has its own AND or OR, the opposite of the rules around it to begin with, and the same menu under a group adds a sub-group inside it, such as “plan is Pro AND (country is France OR country is Spain)”. The menu under a group also offers Ungroup, Duplicate and Delete group.
A rule outside the groups must always match: AND or OR only decides how the groups combine.
Device and platform rules pick their values with toggles: click Desktop, Mobile or Tablet to turn each one on or off. The options your plan does not include are disabled.
When some of these rules share their groups with conditions set in another section of the page, such as the pages, the window shows those as Conditions set in other sections, and the AND and OR can’t be changed there.
Choose where
Section titled “Choose where”Under Where:
- Tick the devices: Desktop, Tablet, Mobile. For mobile, click the value to keep only some platforms (Web, iOS, Android).
- For websites, keep On all pages or choose On specific pages and enter URL rules. Check whether the final
/belongs in the address. - For mobile apps, choose On specific screens to target screen names.
Choose when
Section titled “Choose when”Under When, add optional conditions on the moment: After a session of a number of seconds, a scroll depth, User reached an element, App version for mobile apps, or Element presence check to show the survey only when an element is on the page.
Combine triggers in advanced mode
Section titled “Combine triggers in advanced mode”The sections above are the Guided mode: one trigger, and conditions that must all match. To display the survey on one trigger or another, switch to Advanced at the top right of Targeting rules.
Advanced mode shows the same conditions as one list of rules, triggers included, and you combine them in groups as described in Combine rules. For example, to ask users who spent two minutes on your site, when they leave or when they stop interacting:
- Switch to Advanced. The rules you set in guided mode are all there.
- Add the session duration rule and set it to 120 seconds.
- Open the menu next to Add rule, pick Add rule group and choose the page leaving rule. Add the inactivity rule to the same group, set to 60 seconds, and keep OR between the two.
- Click Save.
You can come back to Guided as long as it can show your rules: one trigger, and no trigger or page condition inside a group. Otherwise it is disabled. Hover it to read why and to see the rules to change framed in the list.
Advanced mode is not available with the On element click and On manual trigger in your code triggers. The dates, time window, sampling and capping stay in the settings below.
Set the survey settings
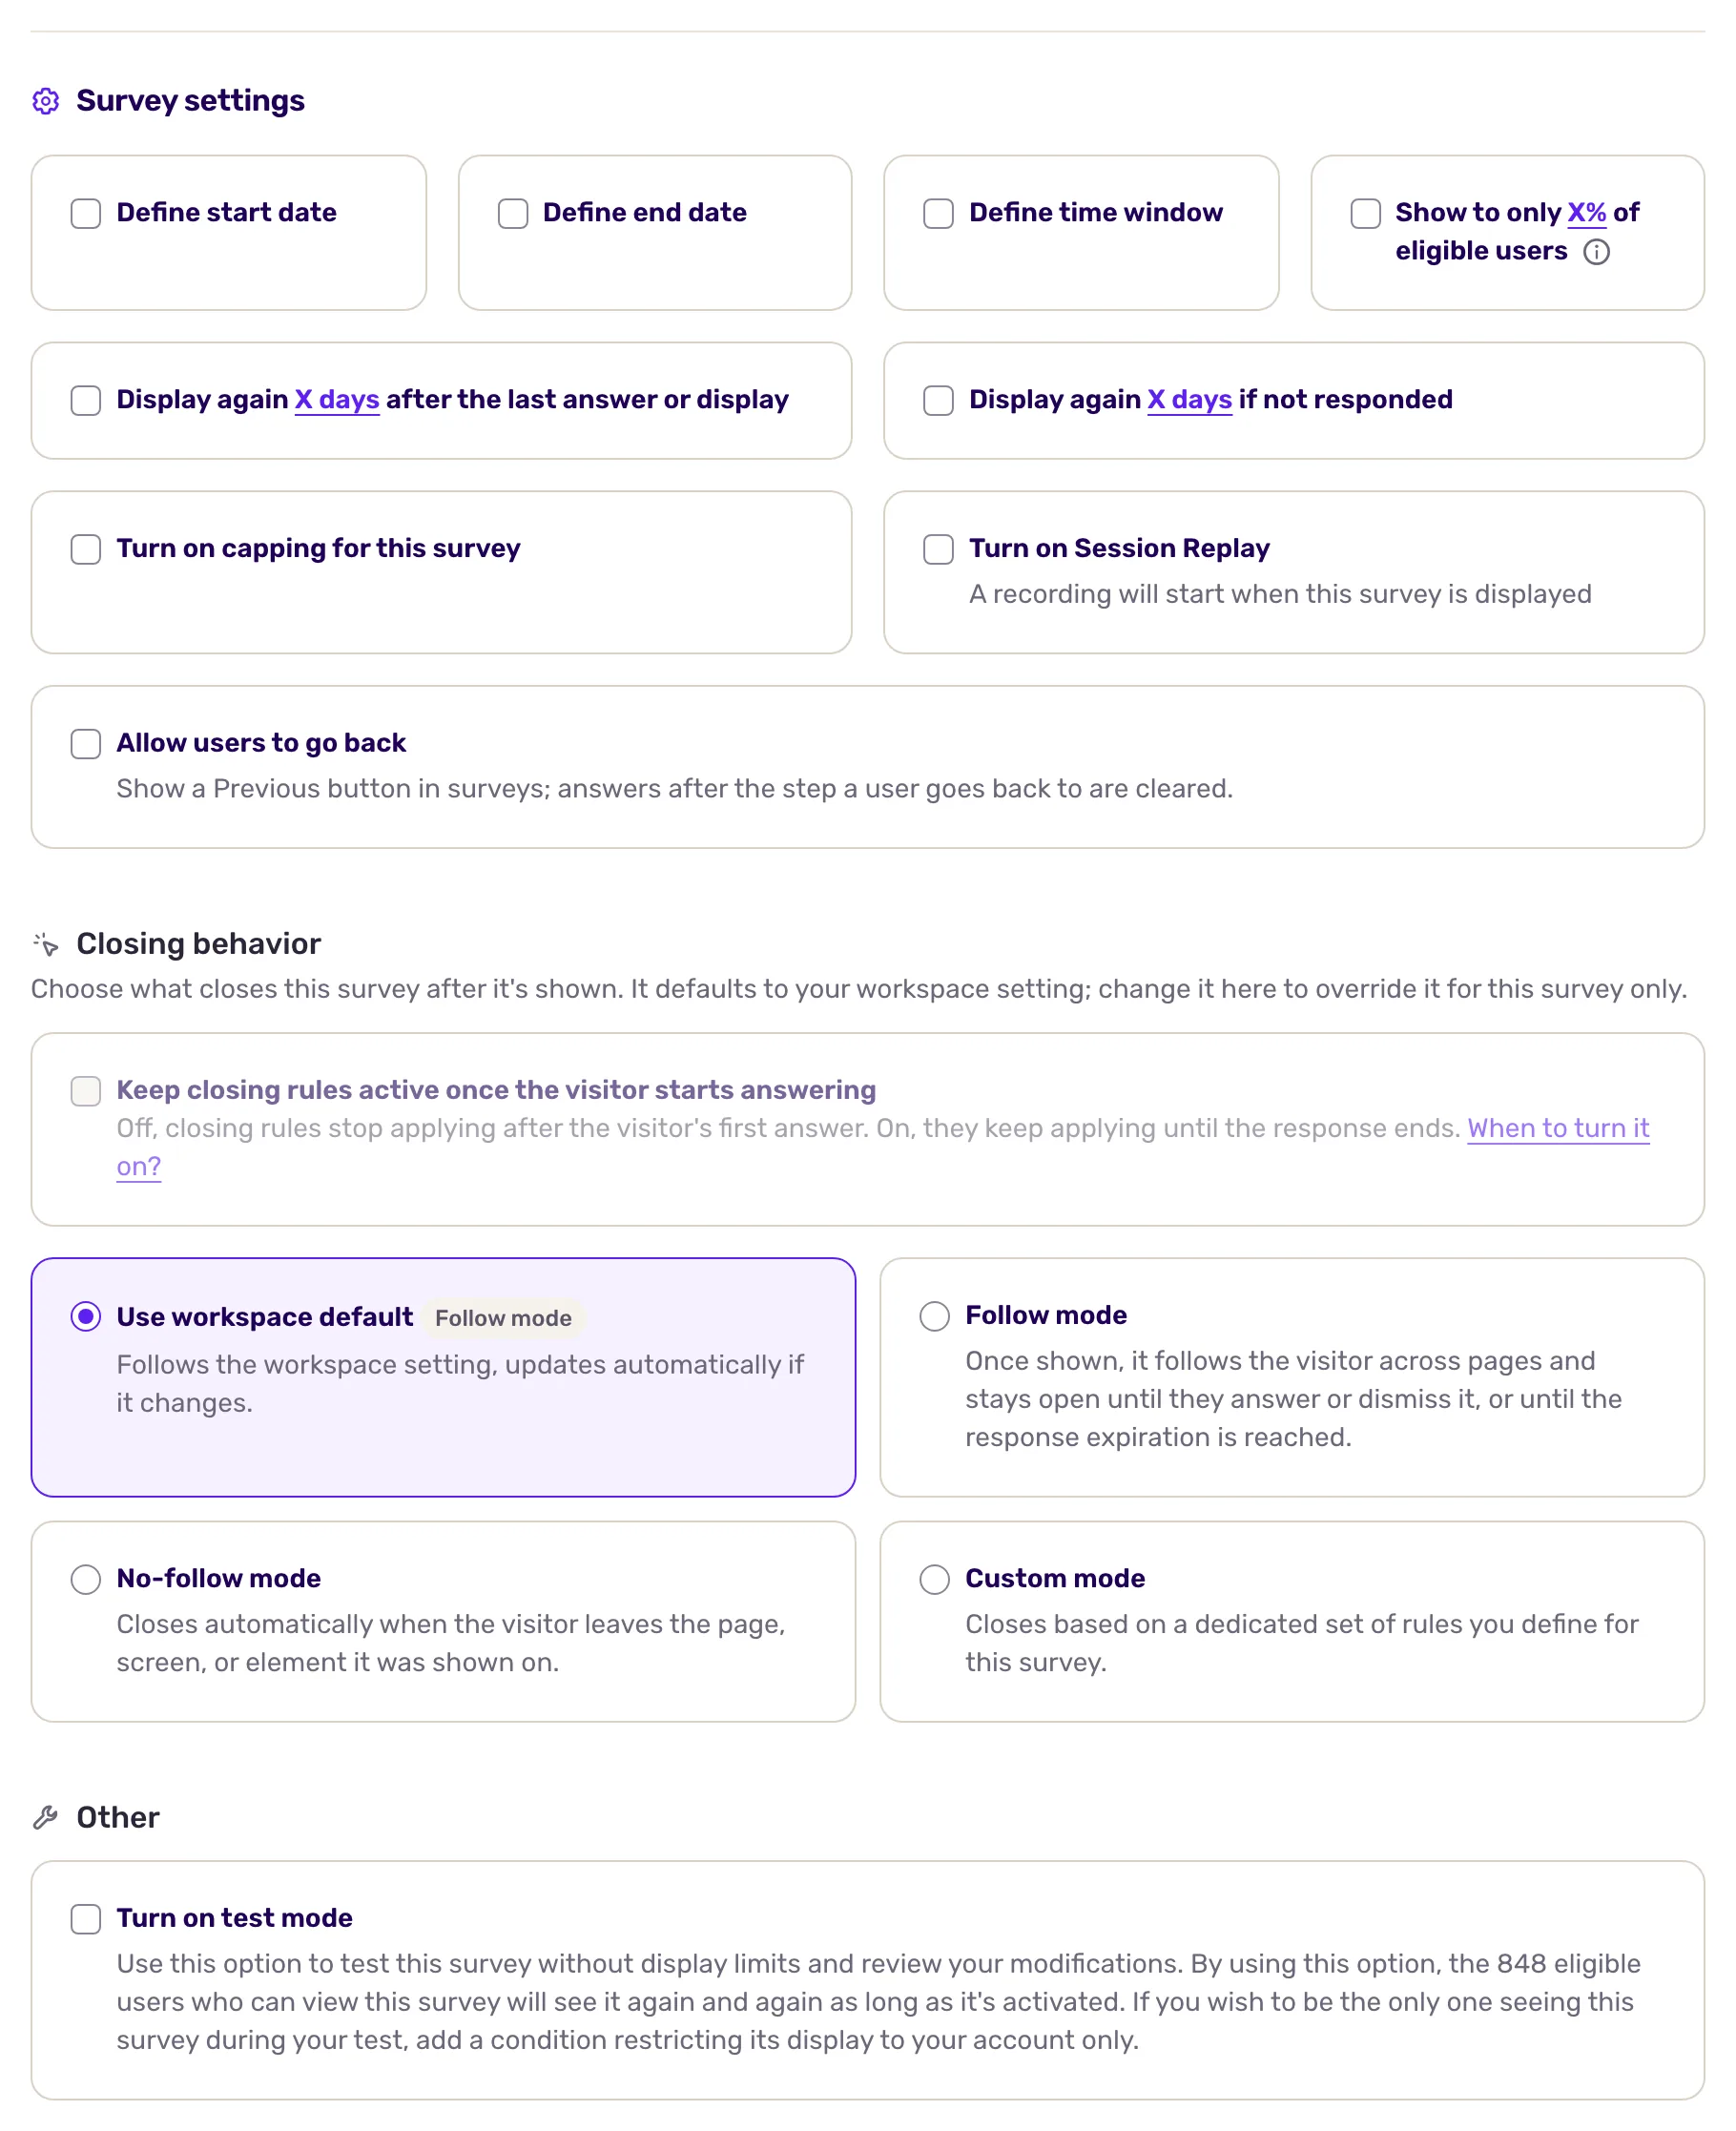
Section titled “Set the survey settings”Below the targeting, Survey settings sets when and how often the survey runs: start and end dates, time window, sampling, display again and capping. See Configure your survey settings, and Control when a survey closes for what closes it once shown.
Save and set live
Section titled “Save and set live”- Click Save at the top right.
- Click the Set live button at the top right, followed by the channel name. When the channel has no targeting rule, or Screeb has not seen any user yet, confirm. The survey starts showing to the users who match.
What you get
Section titled “What you get”The survey shows only to the users, devices, pages and moments you chose. Changes to a live survey apply once saved.
Troubleshooting
Section titled “Troubleshooting”The survey does not show. Open Screeb Inspector on the page: its Surveys tab shows which rule fails. See also My survey or message is not displayed.
The page says “This targeting can never be met” Some conditions contradict each other, so no user can ever match. Review the conditions it lists.
Saving is refused. A condition is missing a value: complete or remove it. On an Embedded survey, saving also waits for the element under Embedded in: enter its CSS selector.