

Customize the design of your surveys
Set the default look of your surveys for each channel, then give one survey its own format, colors and position when it needs to stand out.
Make your surveys look like your product. You set a default design for each channel once, and every survey uses it. When one survey needs something different, give it a specific design on that channel only.
Before you start
Section titled “Before you start”- Your role lets you edit surveys and update the organization settings.
- The format, position, answer colors of the Conversational format, inner colors of the Card format and sender are always available. Sizes, fonts, borders, buttons, overlay, progress bar, question colors and header colors need advanced customization in your plan: without it, these fields are locked and offer an upgrade.
Set the default design of a channel
Section titled “Set the default design of a channel”- Open the settings and find the Survey design settings group. It has one entry per channel: Proactive survey, Embedded survey, Email survey, Feedback button and Link survey.
- Click the channel, for example Proactive survey. A live preview shows on the right and updates as you change a setting.
- For a proactive survey, choose the Default format: Conversational, which reads like a chat, or Card, a more classic form.
- Under Graphical settings, open the Conversational or Cards tab. Each format keeps its own settings.
- Adjust the settings, described below.
- Click Save at the top right.
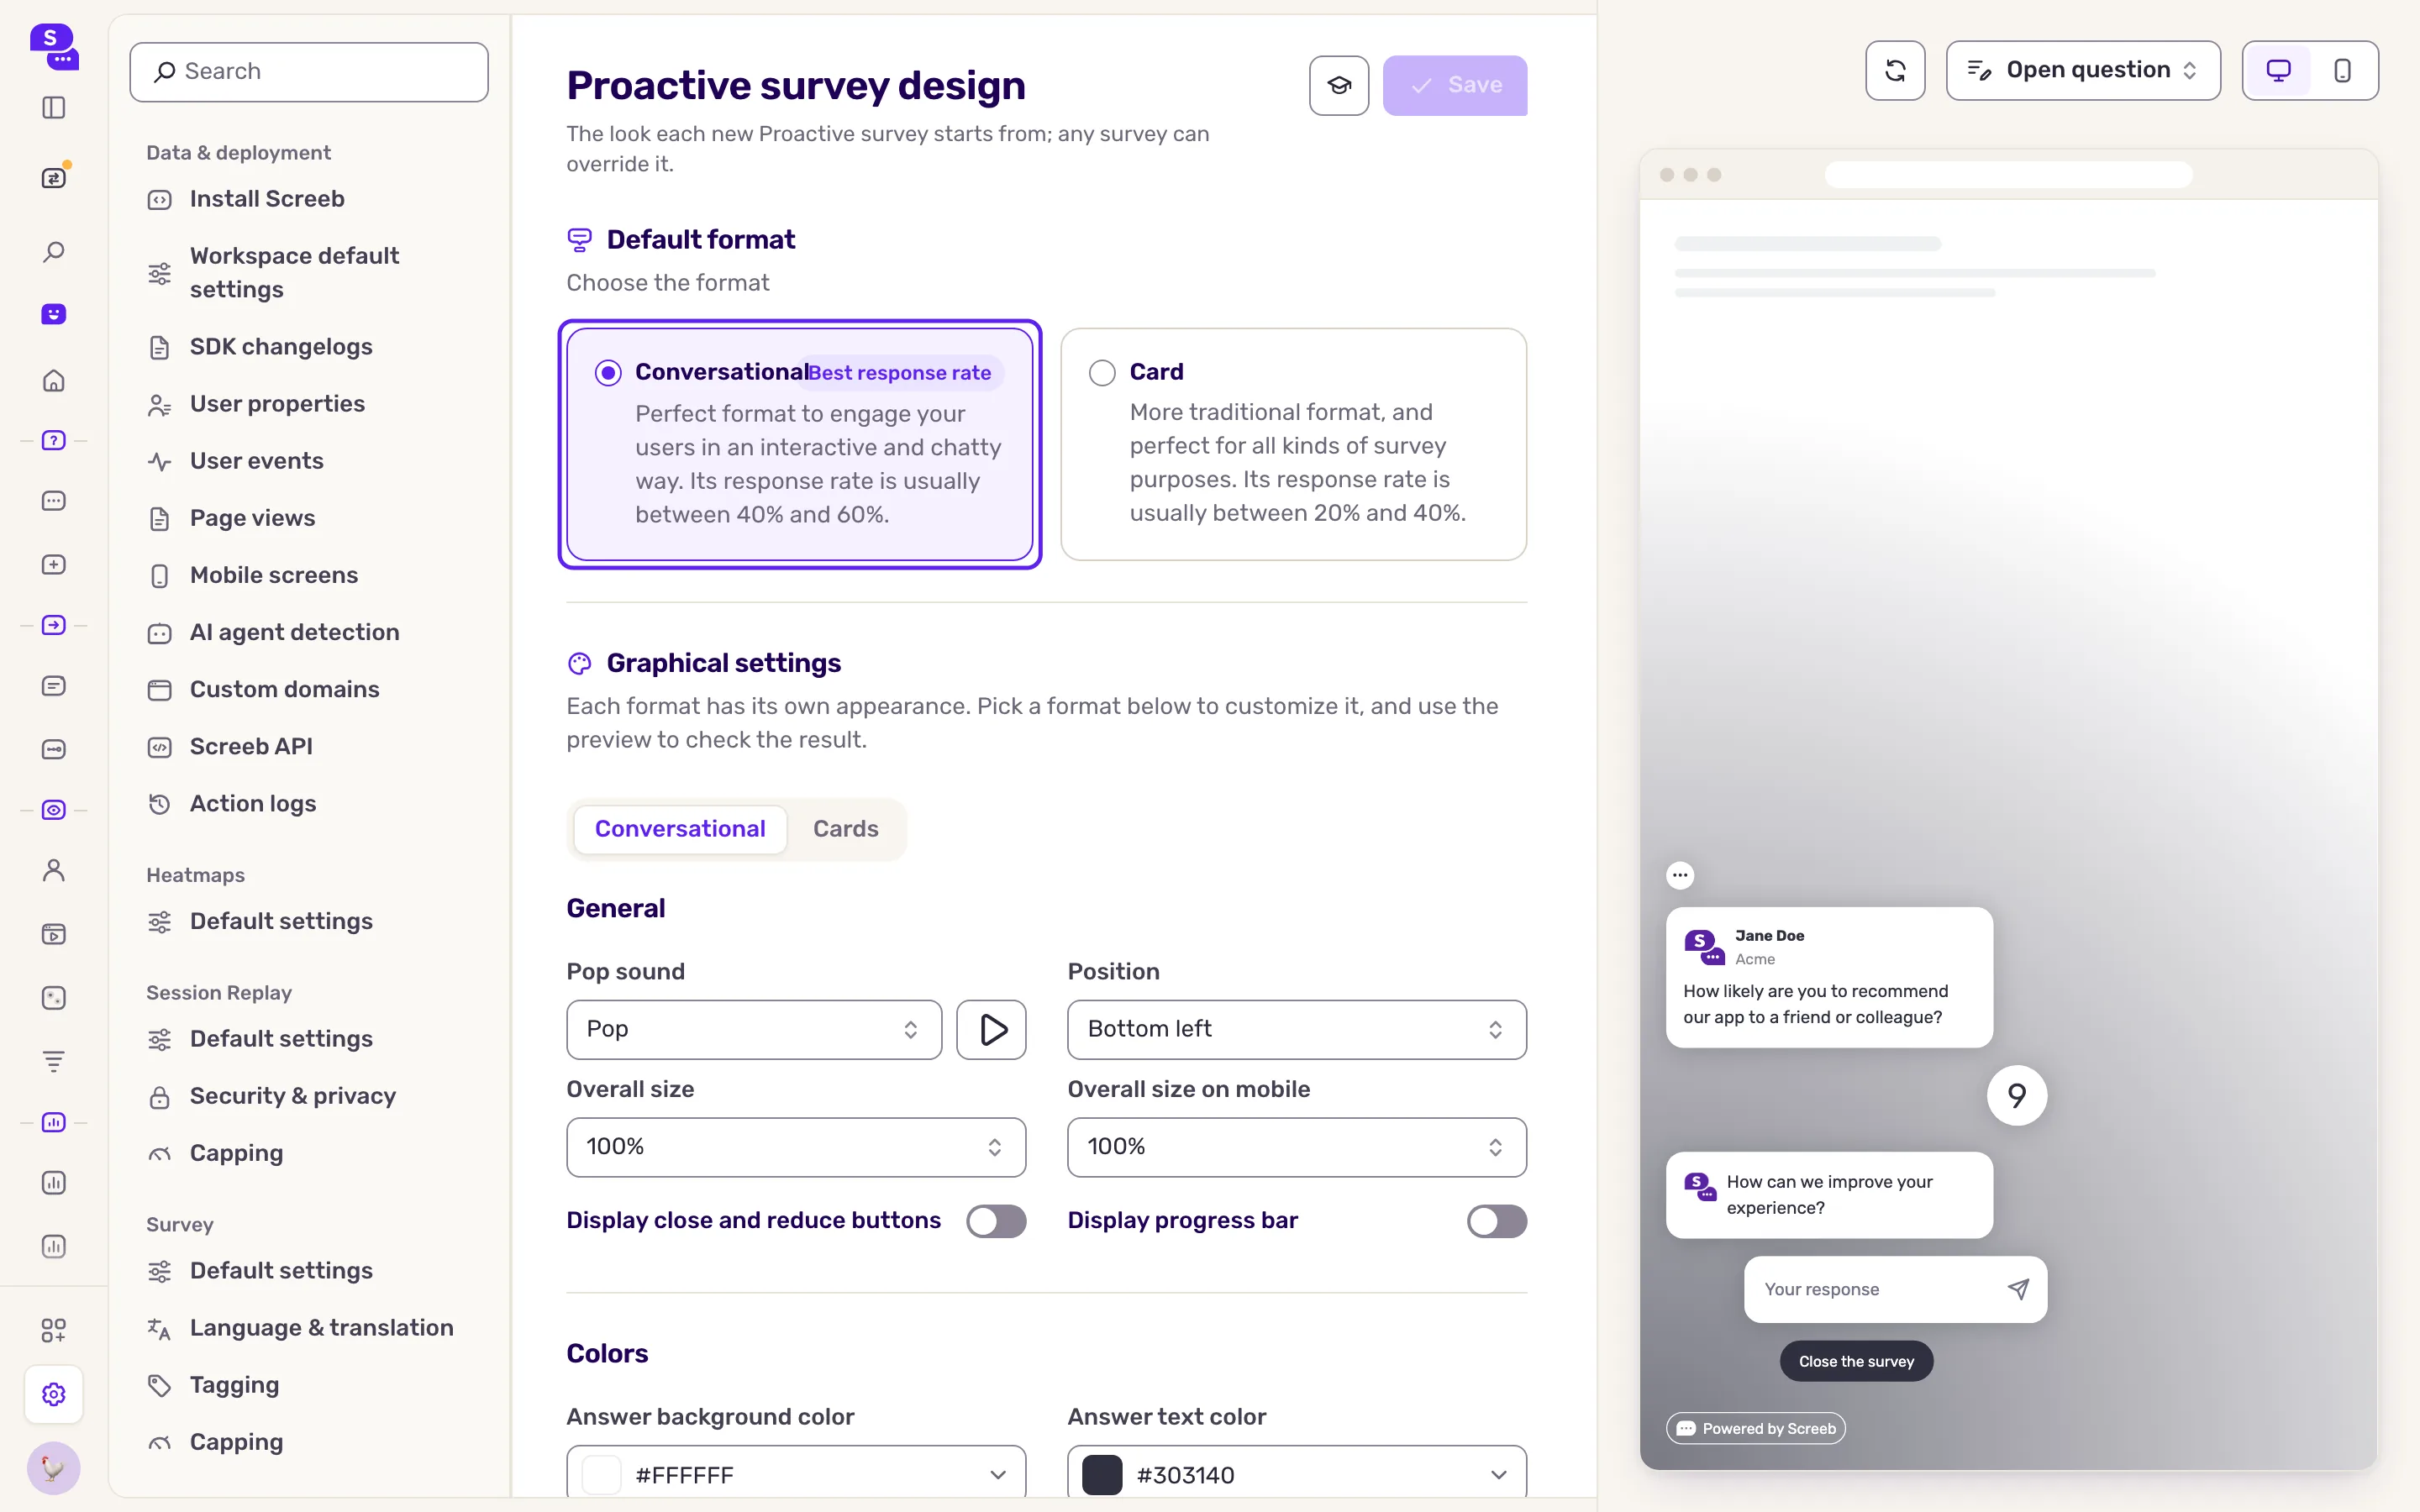
The main settings of a proactive survey:
| Section | What you set |
|---|---|
| General | Position on the screen (Conversational: bottom or middle, left, center or right; Card: bottom left, center or right, or a single middle position), Pop sound, sizes on desktop and mobile, Display close and reduce buttons, progress bar. |
| Colors | Conversational: background and text colors of the answers, and of the questions (advanced). Card: inner background and text colors, and header colors (advanced). |
| Font | Family, size and line height. |
| Border | Radius, border line and shadow of the survey and of its buttons. |
| Overlay | When the page behind is dimmed (never, always or from the first answer) and with which color. |
| Display name, avatar and title | Who the survey seems to come from: Screeby, a person with a name, title and avatar, your logo, or nobody. |
The other channels have their own sections: the feedback button sets the button that opens the survey, link and email surveys set the page background. See Add a feedback button and Send a survey by email.
Give one survey its own design
Section titled “Give one survey its own design”- Open the survey and click Design & targeting at the top.
- Under the channel, click Design.
- Under Design source, switch from Workspace design to Specific design. The settings appear, prefilled with the workspace design.
- Change the Format or any setting. The undo arrow next to a changed field puts back the workspace value.
- Click Save.
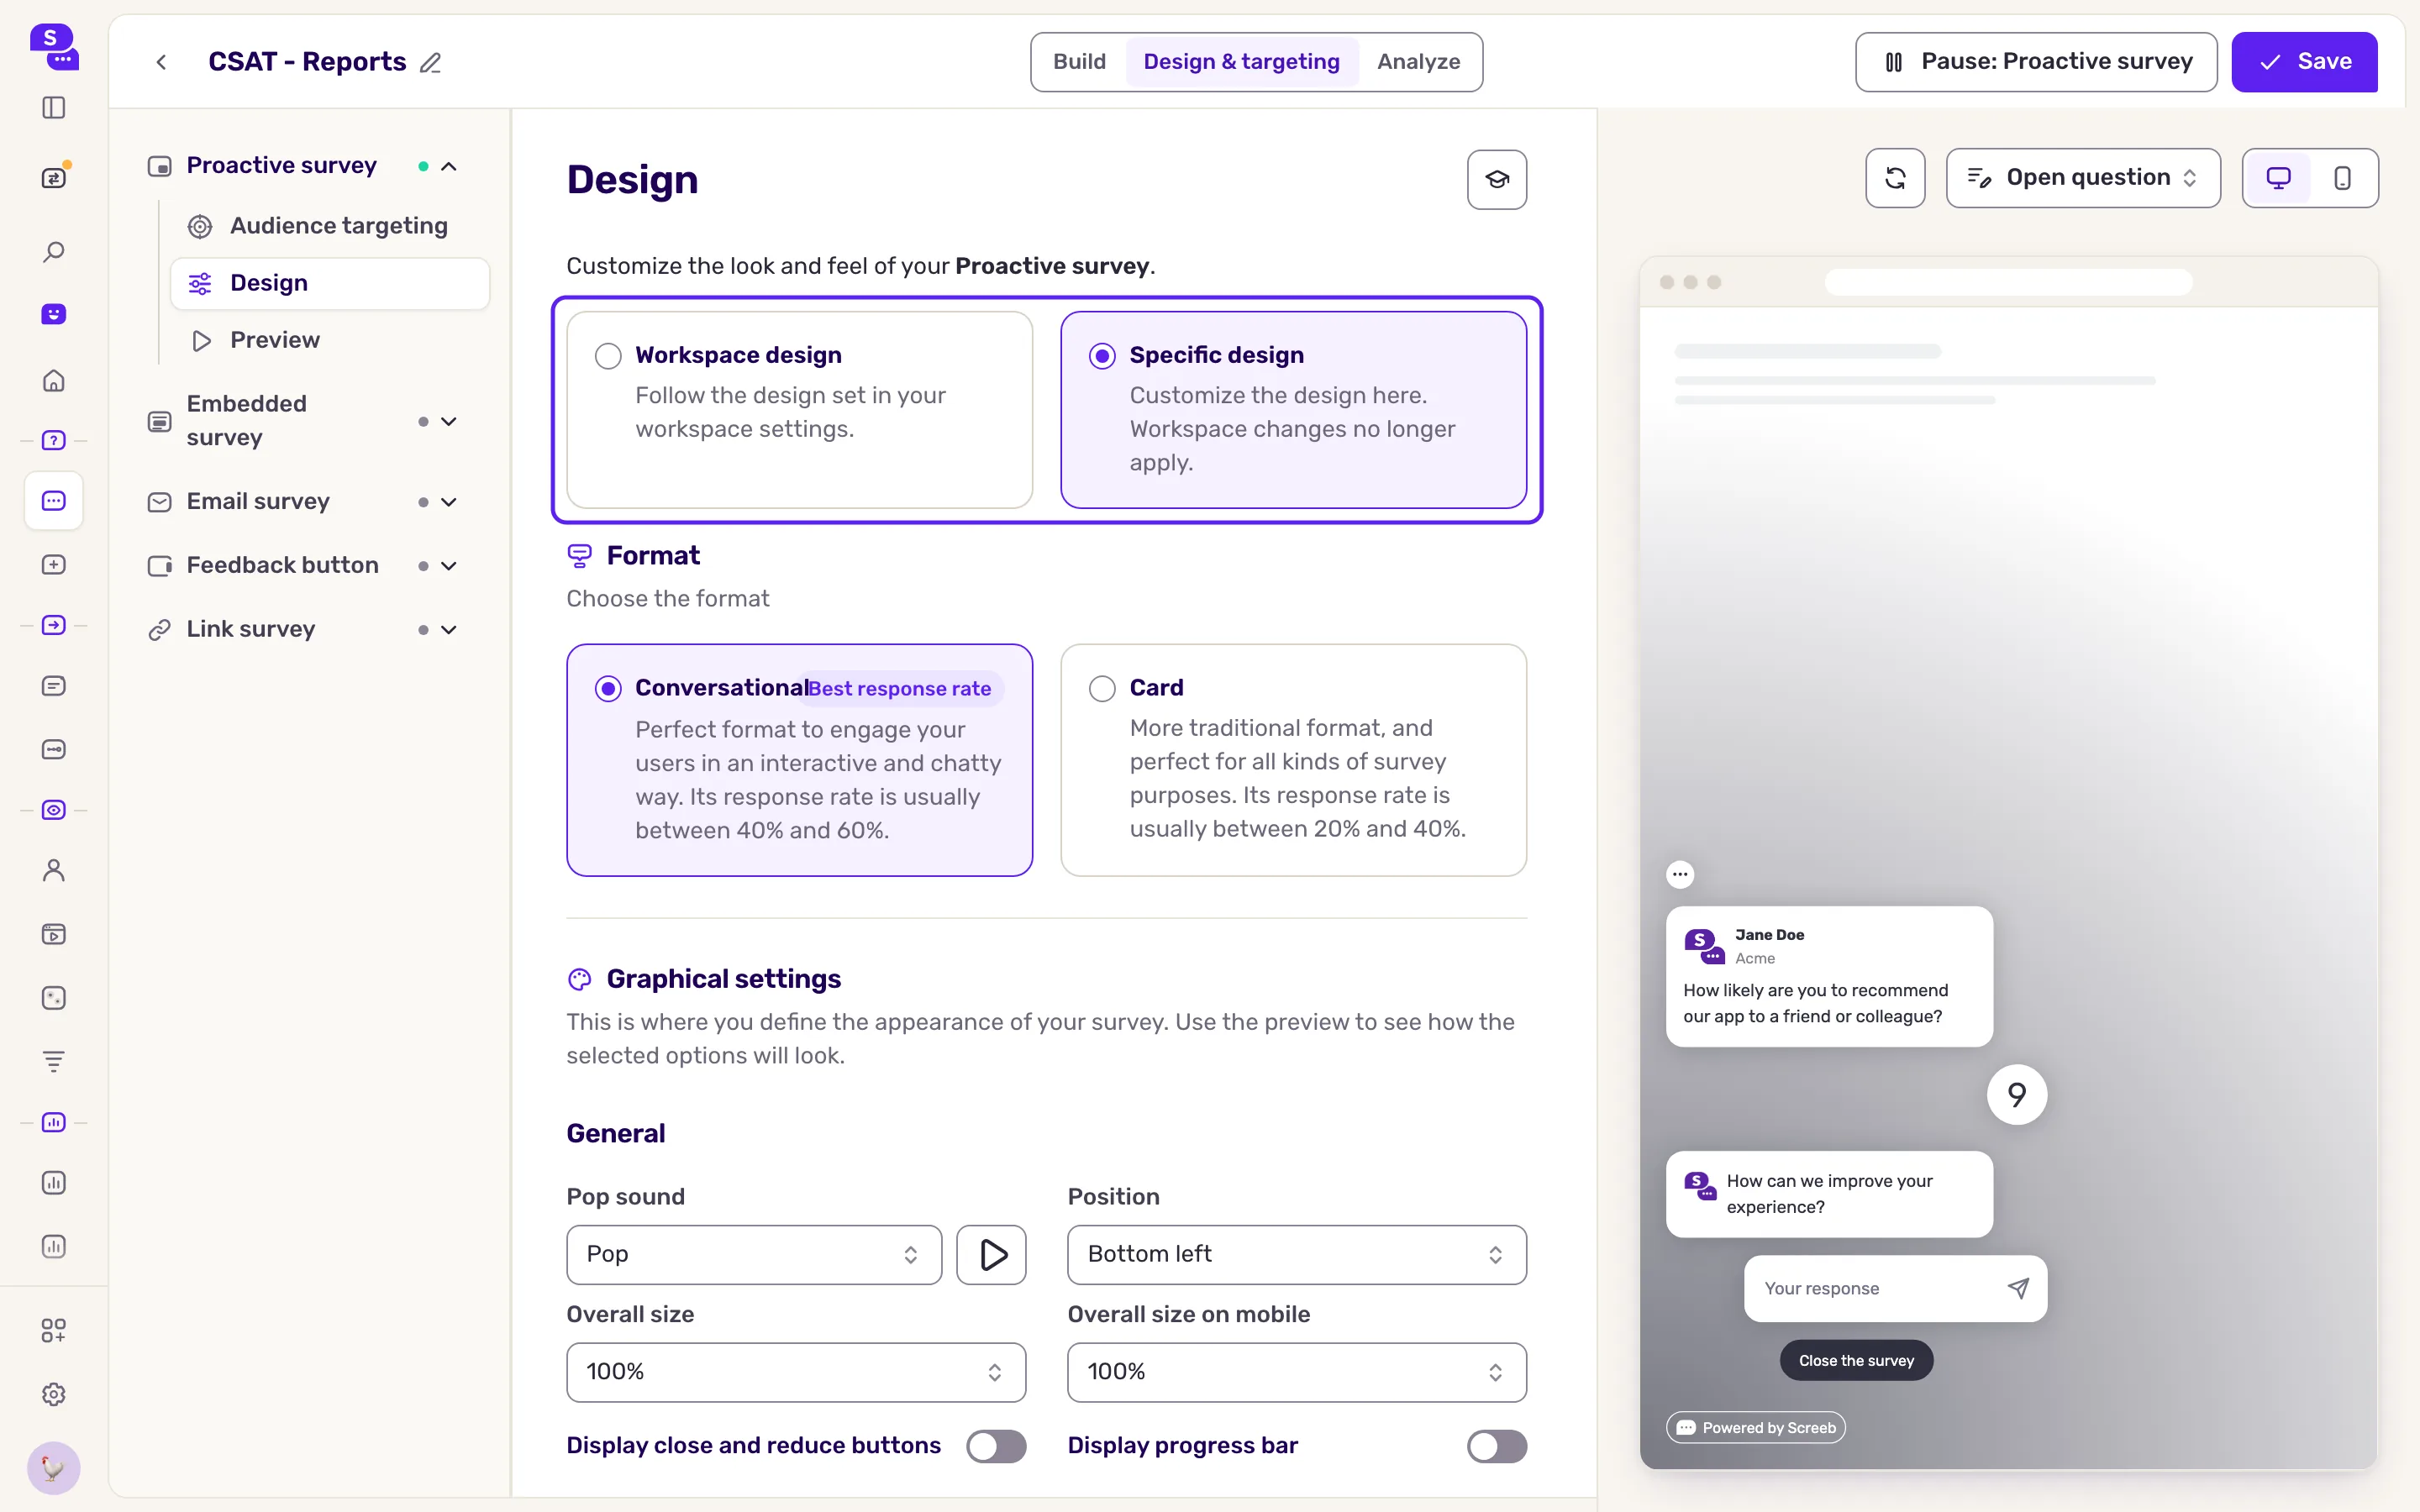
In the side menu, the channel’s Design entry now shows Custom. To go back to the default, click Workspace design.
What you get
Section titled “What you get”Every survey on a channel uses the default design of that channel, so a change there applies to all of them at once. Surveys with a specific design keep their own and ignore later changes to the default.
Troubleshooting
Section titled “Troubleshooting”A field is locked with an upgrade prompt. It belongs to advanced customization, which your plan does not include. Upgrade your plan to unlock it.
The survey does not show the change. Check the design source of its channel: with Specific design, the default design does not apply. A page already open may need a reload to show it.
Save stays disabled. Nothing changed yet, or a value is invalid, such as a malformed color code. Fix that value.